Metal Putty: Transforming Imperfections with Filler Magic
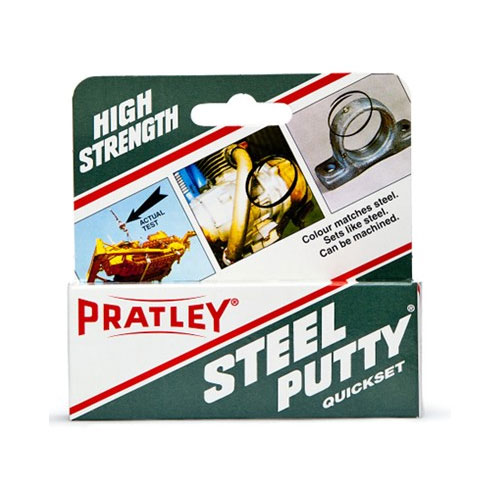
Metal putty, a remarkable substance that has the power to transform imperfections into seamless perfection. With its magical filler properties, metal putty offers a simple yet effective solution to repair, restore, and beautify various metal surfaces. Whether it’s a dent, a scratch, or a hole, this versatile material can work wonders in bringing back the flawless shine and functionality to your metal belongings. So, let us delve into the realm of metal putty and discover the art of transforming imperfections with this enchanting filler magic.
Crafted with precision, metal putty acts as a potent adhesive, bonding seamlessly with metal surfaces and providing an ideal canvas for repairs. The putty’s unique composition, often a combination of binders and metal powders, results in a pliable material that can be easily molded and shaped to suit the contours of different structures. Its versatility allows it to adapt to various metals, whether it be aluminum, stainless steel, or brass, making it a reliable choice for all types of repairs.
The application of metal putty is a straightforward process that requires just a few simple steps. Firstly, the surface must be thoroughly cleaned to ensure optimal adhesion. Once prepped, the putty can be applied using a spatula or even by hand, following the contours of the damaged area. The beauty of metal putty lies in its ability to seamlessly blend with the surrounding metal, making the repaired spot virtually indistinguishable from the rest of the surface. Whether used for minor touch-ups or major restoration projects, metal putty offers a transformative solution that leaves no trace of its magical intervention.
Benefits of Metal Putty
Metal putty offers a range of benefits when it comes to transforming imperfections and achieving a flawless finish. Whether you’re working on a small DIY project or tackling a larger repair job, metal putty filler can be a real game changer.
-
Versatility: Metal putty is versatile and can be used on various types of metals, including steel, aluminum, brass, and more. This makes it a go-to solution for different applications, whether it’s fixing a dent on a car or repairing a damaged metal tool.
-
Easy Application: Metal putty filler is user-friendly, making it accessible to both professionals and beginners. It can be effortlessly applied to the affected area without the need for specialized tools or equipment. With its smooth consistency, it is easy to shape and mold, ensuring a seamless repair.
-
Durability: One of the key advantages of metal putty is its durability. Once cured, it becomes incredibly strong, resistant to weathering, corrosion, and other forms of damage. This ensures that the repaired area remains intact and maintains its original strength over time.
By offering versatility, ease of application, and durability, metal putty is an invaluable tool for anyone looking to eliminate imperfections and restore the beauty and functionality of metal objects. With its filler magic, metal putty opens up possibilities for enhanced repairs and transformations.
How to Use Metal Putty
When it comes to fixing imperfections in metal surfaces, metal putty can work like magic. Whether you need to repair a scratch, fill a gap, or restore a deteriorated area, metal putty is a versatile solution. In this section, we will explore how to effectively use metal putty to transform those imperfections into seamless perfection.
-
Prepare the Surface:
Before applying the metal putty, it is crucial to prepare the surface properly. Start by cleaning the area to remove any dirt, grease, or debris. You can use a mild detergent or solvent for this step. Once clean, ensure that the surface is completely dry. This will help the metal putty adhere better and provide a long-lasting repair. -
Mix and Apply:
Most metal putties come in two components that need to be thoroughly mixed before application. Follow the manufacturer’s instructions for the recommended proportions and mixing process. Once the two components are mixed, you will have a workable putty with a limited working time, so it is important to prepare only as much as you can use within the specified timeframe.
Using a putty knife or a similar tool, apply the mixed metal putty directly onto the imperfection. Ensure that you fill the gap or cover the damaged area completely. Smooth out the putty using the putty knife, feathering the edges to blend it seamlessly with the surrounding surface.
- Allow for Curing and Finishing:
After applying the metal putty, allow it to cure according to the manufacturer’s instructions. This can range from a few hours to overnight, depending on the specific product. It is important not to rush this step, as proper curing ensures the durability and strength of the repair.
Once the metal putty is fully cured, you can proceed with any necessary finishing touches. Sand the repaired area gently to achieve a smooth surface. Start with a coarse-grit sandpaper and gradually move to finer grits for a polished finish. Finally, you can paint or further treat the repaired surface to match the surrounding metal, if desired.
Remember, using metal putty requires attention to detail and patience. Following these steps will help you achieve professional-looking results and restore your metal surfaces to their former glory.
Tips for Achieving Seamless Results
-
Choose the Right Metal Putty
When it comes to achieving seamless results with metal putty filler, selecting the right product is crucial. Different metal putties are designed for specific purposes, so make sure to choose one that matches the type of metal you are working with. Additionally, consider factors such as the color and texture of the putty to ensure a seamless blend with the surrounding surface. -
Prepare the Surface
Before applying the metal putty filler, it’s important to properly prepare the surface. Ensure that it is clean and free from any dirt, grease, or rust that could affect the adhesion of the putty. Sanding the area lightly can also help create a rough surface, allowing the putty to adhere better. Taking the time to prep the surface correctly will contribute to achieving a seamless finish. -
Apply in Thin Layers
To achieve a seamless result, it’s best to apply metal putty filler in thin layers. This allows for better control and avoids excessive build-up that could result in an obvious repair. Start with a small amount of putty and apply it using a putty knife or similar tool. Smooth out the putty as evenly as possible, ensuring it is flush with the surface. Gradually build up thin layers as needed until the imperfections are filled and the desired result is achieved.

By following these tips, you can harness the magic of metal putty filler to transform imperfections into seamless repairs. Remember to choose the right putty, prepare the surface properly, and apply it in thin layers for the best results.


